Saturday, 24 March 2012

An early start on my Y5


An early start to Saturday morning - all of those years of 6am alarm calls means that I find it impossible to stay asleep at weekends - saw me heading to the workbench for some soldering before the rest of the household woke. 

Fortified with a strong coffee, my first task was to finish soldering the cab wrapper in place from where I left off last night.  This was soldered in place around the seams, and the edges cleaned up.  It's an almost perfect fit, with just a tiny excess around the edge to enable you to get it properly centred and fixed, and then a few strokes of the file mean that the base layer and the overlay are visually one.

After this, it is the cab sides - again in the form of overlays.  In this case, I'm using my RSU to put them in place.  It enables a really neat finish, and very controlled soldering.  The first step, after removing the parts from the fret and cleaning off the (minuscule) tags, is to tin them.  Here I'm using a thin layer of 188 solder paint, and wiping it on with a conventional iron.
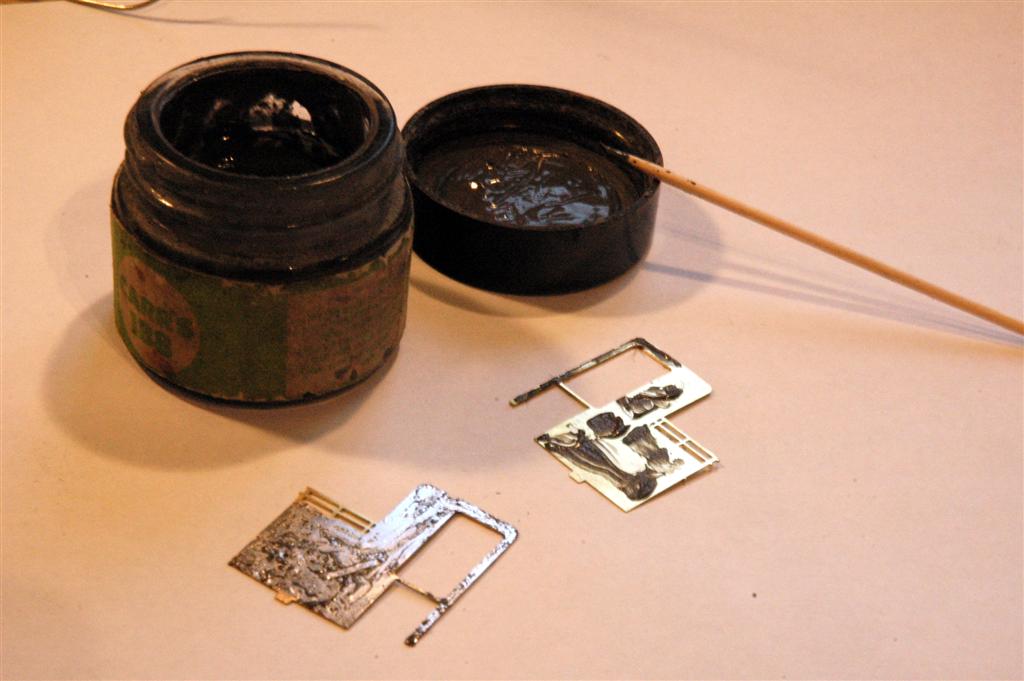

High Level Kits make plentiful use of locating tabs to help you put everything together correctly, and in the right place.  In this case, there is a convenient slot in the footplate that takes the tab that is just visible at  the bottom of the cabside.  I took two steps to help ensure that the parts located snugly:

- clean back any excess solder from the right-angle where the cab base layer meets the footplate so that the overlay can fit all the way down.  This was done with the back of a scalpel blade as a scraper, then finished off with a fibreglass pencil

- ensure that the tab is slightly chamfered - a few gentle strokes with a file and nothing more - to enable it to enter into the slot easily.

Then it was the use of the RSU to work carefully around the cabside to put it into place, avoiding working to quickly so that there was no heat build-up and distortion.


Just visible in the front bottom corner of the overlay is a spot of solder that I used as a tack to ensure that the piece didn't move before I started using the RSU.  This was then easily cleaned off once everything was securely in place.

Now on to the bunker fronts... And breakfast!

Flymo


Friday, 23 March 2012

Soldering again...

For the first time since Missenden, I have the chance to do some modelling :-)

This is how the body of my "Coffeepot" was left at the end of the weekend:


Although it looks like a nasty accident has befallen the cab, it is actually supposed to be that way.  Chris has designed a very clever way of accurately building the kit that uses a sub-frame over which a wrapper for the cab front, roof and rear is put into place.

It all locates using slots and tabs, and the only tricky bit is bending the curves at the front and rear of the roof.  Even this gets a good tip from Chris - he suggests using a very feint scribed line on the outside of the bend so that the curve is made in the correct place - and he even etches reference marks on the fret to make sure that you get them in the right place...

So this is where I'll be starting from.  Hopefully more pictures to show progress tomorrow!

Cheers
Flymo


Saturday, 10 March 2012

Missenden 2012

And off for a weekend's modelling at Missenden Abbey :-)

Friday night saw the traditional setting up of workbenches and unpacking of kits.  This is my travelling ensemble:


And the kit that I will be making - a High level Y5 GER 0-4-0.  Note printed pictures from the web that I can then scribble on to highlight the detailing that I need.


Friday night is also a time to meet up with old friends.  My group includes David Brandreth , John McAleely from my Area Group CHEAG, and Mark Tatlow (of Portchullin fame).  Here is Mark looking for a place to call his own.


Then after a spot of dinner (fish and chips, with it being Friday) it was down to a couple of hours modelling.  And at the end of it, I had a laminated footplate (all done with a resistance soldering iron - thank you London Road Models) and a set of splashers.  You wouldn't think it, but even with such small parts, using a set of GW Models rolling bars made forming the splashers really easy.


 And that's progress so far!  Now I'm wasting valuable modelling time, so more later...

Flymo

Thursday, 23 February 2012

Finding inspiration...

Sometimes you find something that inspires you to get modelling again.  A recent treat for myself that did just that is a newly published book, "London's East End Railways":


It's a hard cover publication, containing both a narrative story of the author's experiences of working in the Eastern Region of British Railways, and some excellent photos from all periods back into Great Eastern days.  This volume covers the line out (roughly) from Liverpool Street Station to Stratford station and locomotive works.  

The pictures are almost uniformly interesting and of very good quality.  Highly recommended for any Great Eastern modeller that wants to soak up the atmosphere, research details for modelling, or just enjoy a rather interesting story.

Flymo

Sunday, 19 February 2012

Choices, choices...

Only a couple of weeks to go now until the Missenden Spring Modelling Weekend.  I don't know if anyone else is being tempted to put in a last minute appearance, to join the four Scalefour Society members that I know will be there.

The problem now for me is to choose what kit to take along to spend 48 hours of unadulterated modelling pleasure building.  Over the last two years at Missenden I've started on my Y14, and my GER tram engine - both of which are in the final stages of the paintshop.  So I had a good rummage in my box of kits to see what was there...

And the short-list is currently comprised of:

Alan Gibson GER F4/5 2-4-2T.  It's an etched brass kit,  it's a known quantity, and I enjoy putting AG kits together.

Alan Gibson GWR 517 class 0-4-2T.  This is mostly white metal, with etched chassis and other brass bits.  The second P4 loco that I ever built was one of these some twenty five years ago, when the previous incarnation of it was the M&L Kits version.  

High Level Kits GER Y5 0-4-0T.  Etched nickel silver, and the kit just oozes quality.  I love HLK kits - the question is whether I fancy doing another tiny locomotive so soon after the Pug...

I'm not going to take all three along.  At the moment, the current hot picks are the 517 and the Y5.  One for nostalgia and one for the sheer class of the kit.  I'll pack the relevant research books - I've got Russell's "Great Western Engines" by my elbow at the moment - and make a decision when I get there!

How does that sound?

Cheers
Flymo


Friday, 17 February 2012

It fits!

And just because it did, and I had the camera to hand, a quick snapshot...


The painting is at the "blocking in colours" stage, so there are a few blemishes and marks to be corrected, and  of course it will get a coat of satin varnish before weathering is started on it.

Flymo


Dangerous games...

I'm not entirely sure that I'm supposed to use a slitting disc in a mini-drill to remove the corners from a Mashima 1220 motor in order for it to fit more easily between axleboxes in the frames...

However nothing appears to have flown loose, and I'm confident that it *will* work when I put power through it.

Oh, if only I'd planned this properly before I put chassis and body together, rather than treating them as two standalone projects!

Flymo